Chicken Kiev in the Air Fryer
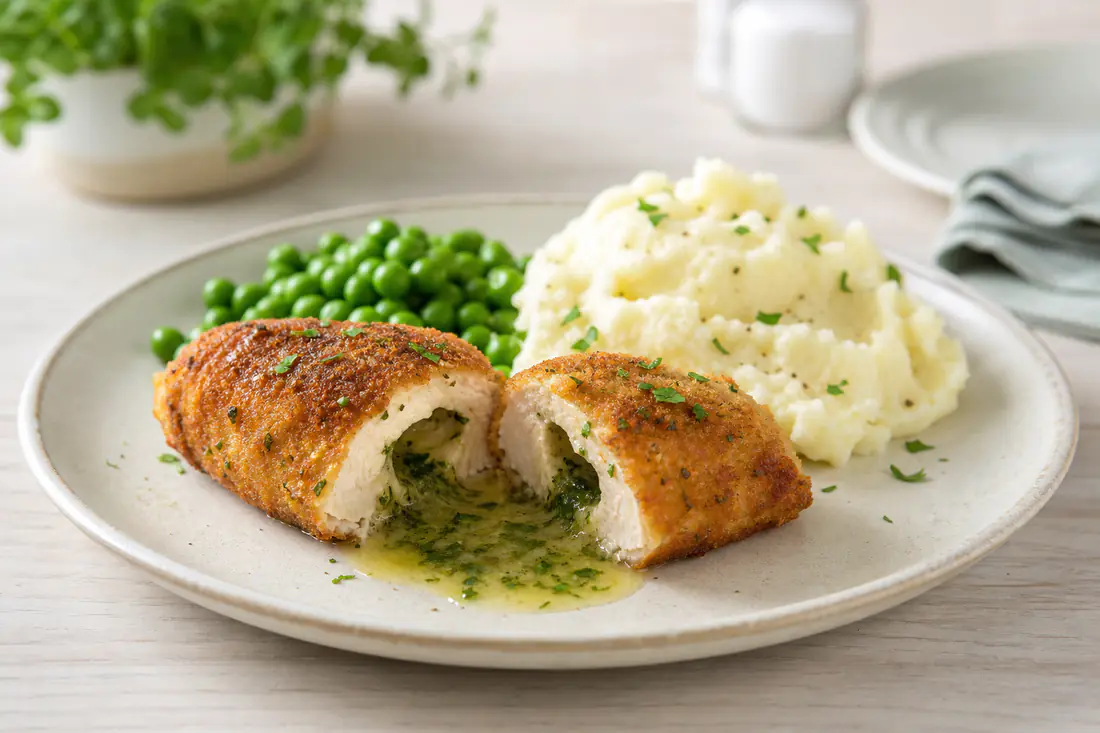
A chicken kiev has to be crisp on the outside, cooked through in the middle and still hold its garlic butter inside. The oven often leaves the crumb pale and the butter leaking, while the air fryer browns the coating quickly and seals the edges. This page covers both homemade kievs and the frozen or chilled ones from the supermarket, with times for each.
- Temperature
- 180°C
- Total time
- 1:27hr
- Prep
- 25min
- Servings
- 4
- Core temp
- 75°C
- Per serving
- 510kcal
Why the air fryer works for chicken kiev
Chicken kiev in air fryer baskets gets a crisp, even crumb with much less oil than shallow frying. The fast-moving hot air browns the breadcrumb coating from every side at once, so you do not need to turn a kiev again and again in a pan. It also heats the chicken evenly, which matters because the garlic butter in the middle slows down the centre.
A kiev is a thick, filled piece of chicken, so patience is needed. A whole breast with butter inside takes around 22 minutes at 180 °C, which is a safe, moderate heat that cooks the middle before the crumb darkens. Frozen and chilled kievs are quicker, and the times for both are in the variants. For a simpler breaded chicken without the filling, try chicken schnitzel or chicken breast.
How to make chicken kiev in the air fryer
Tap a time to start a timer.
- Make the garlic butter Mash the butter with the garlic, parsley, lemon zest and a pinch of salt. Shape it into four short logs, wrap in baking paper and freeze for , until firm.
- Cut the pockets Lay each chicken breast flat. With a small, sharp knife, cut a deep pocket along the thicker side, taking care not to go through the other side. Season the inside, slide in a butter log and press the edges together.
- Coat Dip each breast in flour, then in beaten egg, then in panko, pressing the crumbs on firmly. For a sealed kiev that does not leak, dip it in egg and crumbs a second time, then chill on a plate for .
- Preheat and load Heat the air fryer to 180 °C for . Spray the kievs generously on all sides with oil. Place them in the basket, seam side down, with a space between each one. If your basket is small, cook two at a time.
- Cook Cook for at 180 °C, turning carefully after . Spray any pale patches with a little more oil. The crumb should be a deep golden brown.
- Check and rest The Food Standards Agency says chicken is safe once it has reached 75 °C for 30 seconds. Push a thermometer into the thickest part of the chicken, not into the butter. Rest the kievs for before cutting, as the butter is very hot.
Cooking times and temperatures
| Chicken Kiev | Temperature | Time |
|---|---|---|
| Homemade chicken kievTurn halfway | 180 °C | 22 min |
| Frozen chicken kievDo not defrost | 180 °C | 20–22 min |
| Chilled shop-bought kievFollow the packet too | 180 °C | 15–18 min |
| Homemade, frozen after coating | 180 °C | 24–26 min |
| Mini kiev bites | 190 °C | 10–12 min |
Times are a guide and depend on the size of the food and the power of your air fryer. Cooked when the centre reaches 75 °C. See also cooking times and temperatures for all dishes.
Tips
- Keep everything cold. Cold butter and chilled chicken stay together much better than room-temperature ones. If the coating feels soft, return the kievs to the fridge for 10 minutes.
- Do not overfill the pocket. A log about 6 cm long and 2 cm wide is enough. Too much butter pushes out through the seam as it melts.
- Use a cooking thermometer. Cutting into a kiev to check releases the butter. A thermometer gives the answer without making a mess.
Serving
Serve the kievs with chips, peas and a squeeze of lemon, or with mashed potato and green beans for a more traditional plate. A simple salad with a sharp dressing cuts through the butter. Cooking chicken kiev in air fryer batches also leaves room to roast some carrots or broccoli in the second batch.
Storing and reheating
Leftover kievs keep for 2 days in an airtight container in the fridge. Reheat them in the air fryer at 170 °C for 8–10 minutes, until steaming hot all the way through (75 °C in the centre). Be careful when you cut them, as the butter inside will be very hot.
Variations
- Cheese and ham: Replace the butter with a slice of ham wrapped around 40 g grated cheddar or mozzarella for a cordon bleu style filling.
- Herb butter: Swap the parsley for chives and tarragon, or add a pinch of chilli flakes to the butter for some heat.
- Smaller kievs: Use chicken mini fillets with a teaspoon of butter in each and cook them at 190 °C for 10–12 minutes.
Troubleshooting
- The garlic butter leaks out
- The butter was not cold enough, or the pocket was not sealed. Freeze the butter logs until firm, press the edges together and use a double coating of egg and crumbs.
- The crumb is pale in places
- The oil spray missed some spots. Panko needs a light coating of oil on every side to brown in the air fryer, and the kievs must not touch each other in the basket.
- The centre is not hot enough
- Kievs from the fridge cook faster than those from the freezer. Always check that the chicken itself reaches 75 °C, and add 3–4 minutes if not.
Frequently asked questions
How long do chicken kievs take in an air fryer?
Homemade kievs take about 22 minutes at 180 °C. Chilled shop-bought kievs take 15–18 minutes at 180 °C, and the packet is the best guide as brands vary.
How long do you cook frozen chicken kiev in the air fryer?
Cook frozen kievs at 180 °C for 20–22 minutes, turning once, without defrosting. Check that the centre is steaming hot and reads 75 °C before serving.
Do you need to oil chicken kievs in the air fryer?
Homemade ones need a light oil spray to brown the breadcrumbs. Most frozen kievs have enough fat in the crumb and need no extra oil, but follow the packet.
Can you cook a chicken kiev from fresh, not frozen?
Yes. A fresh homemade kiev cooks at 180 °C for 20–22 minutes, and a chilled shop kiev for 15–18 minutes. The more the kiev has been chilled beforehand, the better it holds its butter.
Can I make the kievs ahead?
Yes. Coat them and freeze on a tray, then bag them up. Cook from frozen at 180 °C for 24–26 minutes, turning halfway.
Rate this recipe
No ratings yet. Be the first to rate this recipe.